I've tried my hand at patterns before...but mostly in shorthand that only I could understand. Please, by all means tell me of any mistakes you notice so that I may improve the pattern if necessary.
Also, if any of you like this pattern, feel free to sell any of the finished foxes that you make. If you put in the work then you should be allowed to sell what you've made, in my opinion.
Please post pictures of your completed projects. I'd love to see them.
Don't forget to feed your yarn stash!
Mr. Fox Pattern:
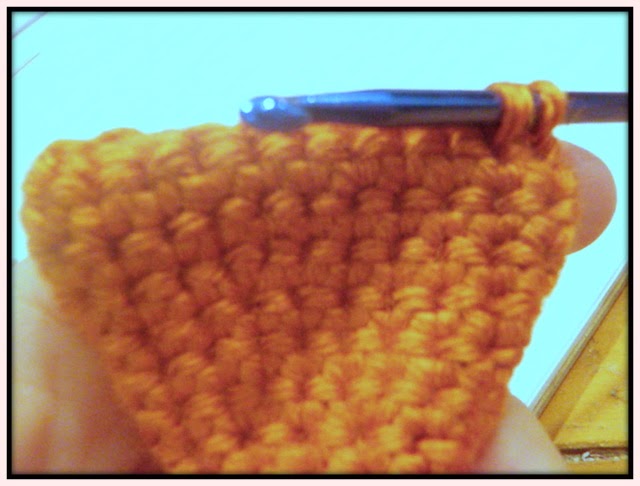
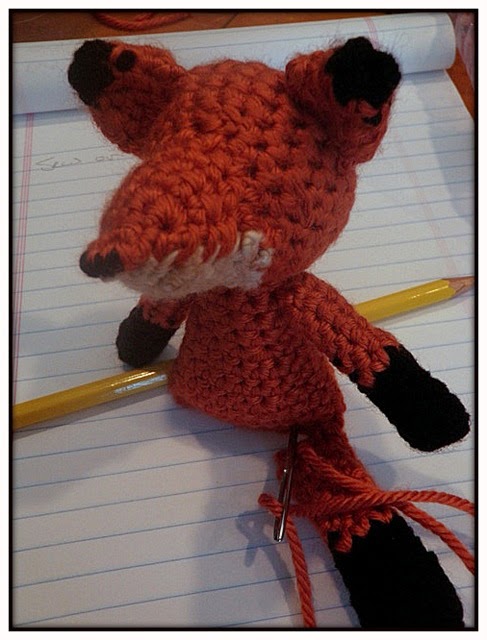
It's pretty standard. It's all single crochet, and a some sewing. He stands about 6 1/2 inches from ear to foot.
Materials: Caron Simply Soft medium 4-ply yarn in "pumpkin" color
Lion Brand Heartland, medium 4-ply yarn in "acadia" color
Caron Simply Soft medium 4-ply yarn in "black" color
Two black buttons for eyes
Black embroidery thread for nose and for sewing on buttons
Polyfill stuffing
Size F (5-3.75mm) crochet hook
Terms:
ch- chain
sc- single crochet
st/sts- stitch/stitches
dec- decrease stitch
sl st- slip stitch
Tips:You might find it easier to mark your place using a stitch marker.
I like to stuff my amigurumi pretty tightly, but you can stuff it less for a squishier toy.
I don't stuff the arms or legs. I like them to be bendy.
I like to weave in the ends as I go along to keep things neat.
When you fasten off a piece that needs to be sewn to the body, if you leave the tail of the yarn long enough, you can use it to sew the piece onto the body.
Head:In "pumpkin" color:
Ch 2
Row 1: 6 sc in the second ch from the hook (6)
Row 2: 2 sc in each st (12)
Row 3: 2 sc in next st, 1 sc in the following st. Repeat until end of row (18).
Row 4: 1 sc in the next 2 sts, 2 sc in the next st. Repeat until end of row (24).
Row 5-8: 1 sc in each st. (24)
Row 9: 1 sc in next 2 sts, dec the following st. Repeat until end of row (18).
Row 10: 1 sc in each st around (18) Start stuffing as you go.
Row 11: 1 sc in next st, dec the following st. Repeat until you have done 6 sts. Switch to "acadia" color for remaining 6 sts (12).
Row 12: Switch to "pumpkin" color. Sc 6 sts. Switch to "acadia" color for remaining 6 sts. (12)
Row 13: Switch to "pumpkin" color. Dec next 3 sts. Switch to "acadia" color. Dec final 3 sts. (6)Fasten off and stitch opening closed.
Snout (Make two...one in "pumpkin" color and one in "acadia" color):
Ch 3 and turn
Row 1: 1 sc in each st. Ch 1 and turn. (2)
Row 2: 2 sc in each st. Ch 1 and turn. (4)
Row 3: 2 sc in next st, 1 sc in following 2 sts, 2 sc in last st. (6)
Row 4-6: 1 sc in each st. (6) Fasten off.
Sew both snout pieces together so that you form a cone shape...leaving the wider end open for stuffing. Stuff snout and line it up on the head so that the "acadia" colors line up together. Sew onto head and embroider tip of snout with black embroidery floss for the nose.
Sew both black buttons over the snout for eyes.
Body:In "pumpkin" color,
Ch 12 and sl st together to form a ring.
Row 1-4: 1 sc in each st. (12)
Row 5: 2 sc in next st, 1sc in the following st. Repeat until end of row. (18)
Row 6-7: 1sc in each st. (18)
Row 8: 1 sc in first 2 sts, 2 sc in the following st. Repeat until end of row. (24)
Row 9-10: 1 sc in each st (24)
Crochet the wide part of the body together at the bottom, leaving the top open for stuffing. Stuff body and sew to the bottom of the head.
Ears (make two):
In "black" color,
ch 2
Row 1: sc 4 sts in the 2nd ch from the hook (4)
Row 2: Switch to "pumpkin" color. 2 sc in the next st, 1 sc in the following st. Repeat till end of row. (6)
Row 3: 2 sc in each st (12)
Row 4: 1 sc in each st (12)
Fasten off.
Sew bottom of ears together. Do not stuff. Sew onto top of head.
Arms (make two):
In "black" color,
ch 2
Row 1: 6 sc in the 2nd ch from the hook. (6)
Row 2-5: 1 sc in each st around. (6)
Row 6: Switch to "pumpkin" color and sc in each st around. (6)
Row 7-10: 1 sc in each st around. (6)
Fasten off.
Sew one arm on each side of the body.
Legs (make two):
In "black" color,
ch 2
Row 1: 8 sc in the 2nd ch form the hook. (8)
Row 2-5: 1 sc in each st around. (8)
Row 6: Switch to "pumpkin" color and sc in each st around. (8)
Row 7-11: 1 sc in each st. (8)
Fasten off.
Sew legs to the bottom of the body.
Tail (now for the "tail" end of the project):
In "acadia",
ch 2
Row 1: 6 sc in the 2nd ch from the hook. (6)
Row 2: 1 sc in each st. (6)
Row 3: 2 sc in next st, 1 sc in the following st. Repeat until end of row. (9)
Row 4: 1 sc in each st. (9)
Row 5: 2 sc in each st. (18)
Row 6: Switch to "pumpkin" color. 1 sc in each st. (18)
Row 7-8: 1 sc in each st. (18) Start stuffing at you go.
Row 9: Dec each st. (9)
Row 10-12: 1 sc in each st. (9)
Row 13: Dec next st, 1 sc in the following st. Repeat until end of row. (6)
Row 14: 1 sc in each st. (6)
Fasten off.
Sew to back of the body.


No comments:
Post a Comment